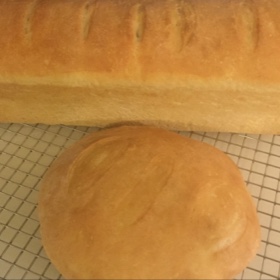
Basic Bread From Starter
Baked Goods, Breads
Ingredients
2 cups starter
4 cups bread flour
2 cups water
Additional bread flour
1 T. salt
2 T. sugar (white, brown, honey, etc.)
Kitchenaid mixer with dough hook
spray bottle
banneton
tea towels
bread pan (not scaled, this is for 4x13 or 4x16)
Description
If you have never made bread before, start with this recipe, or at least read through it for tips before making any of the others.
Directions
Allow the starter to come to room temperature and bubbly before use.

Divide and feed your starter as laid out when you made your Bread Starter.
Use the remaining starter and mix in the flour and water. Mix thoroughly for a few minutes, until smooth.
Cover and let sit at least 30 minutes and up to an hour.
This is the autolyse. Basically the flour absorbs moisture, and the yeast starts breaking down the starches. The end product is a dough that is stronger and more elastic than if you skipped this step. 
Add salt and sugar.
Knead the dough on medium speed and add additional flour a little at a time until it starts to form a doughy ball. This will be more of a blob than a ball. The important thing is that it stays stuck to the hook and doesn't immediately sag back down into the bowl.
Turn out onto a lightly floured board. 
Knead, adding a little flour as needed to keep it from sticking to you, until you form a ball.
Put it in a banneton and fold/rest 4 times with 30 minutes in between.
Put it on your lightly floured board and gently press it down.
Roll it up tightly and pinch the seam into the roll.
Place seam side down in an oiled pan. If it comes more than 3/4ths of the way up, snip some off the end to bake separately or just toss it.
Make cuts across the top with a lame, or if you don’t have one, with scissors.
Spritz with water, cover with a tea towel, and allow to rise until doubled, 1-2 hours.
Depending on your pan, it should be somewhere between the top of the pan and 1 inch from the top of the pan in the highest spot. (From the tip of your thumb to the first knuckle.) 
While you wait, preheat the oven to 350°.
Spritz loaf with water. Bake for 30 minutes. Spritz with water again, and bake an additional 10-15 minutes.
Move to a cooling rack, cover with a tea towel, and cool completely before cutting or putting away.
Bread without a pan:
The directions aren’t really any different. Just shape your dough, put it on a parchment or silicone mat lined sheet, and let rise and bake alongside your other pan or alone. If your loaf is small or you made rolls, you may only need a 25-30 minute bake time total.

Toppings:
After the bread rises, spritz with water, and press the toppings gently into the loaf.
Bake as usual.
Notes
Banneton And Folding Instructions
*You can substitute some of the flour in the recipe with rye, whole wheat, or AP flour.
*Rising will take longer in a cool room and less time in a really warm one. Don’t be worried if it takes more than 2 hours. If you bake a lot, get yourself a proofing box or use an oven with a proof setting.
*Fill your measuring cup loosely, don’t pack the flour in. How much flour you need can vary depending on humidity, so you may use less in winter and more in summer.
*When adding your sugar and salt, sprinkle them across the dough. Don’t dump them in one spot or they may clump.
*When shaping loaves, sometimes the dough is too springy and won't shape or will tear. You can let it rest another 10-15 minutes and try again.
*When to slash? Slashing gives the dough a place to open up, so it will not simply explode outward in a random spot as steam escapes.
Some bakers never slash loaves and let them do what they will. Some bakers slash every loaf just before it goes in the oven.
When I want a bread to rise up and out evenly, I slash the dough before it rises. If I need it to go primarily upward, I don’t slash it until just before it goes in the oven. I don't slash bread bowls, artisan loaves, and some rolls at all.
*You may find that you need to put a baking sheet on the rack below your loaves or double up your silicon mats to keep the bread from becoming too dark on the bottom.
*If you want your bread more brown on top, brush with milk instead of spritzing with water.
*To freeze homemade bread, wrap it in plastic wrap, then foil before putting it in the freezer. Eat within 6 months. Unwrap from the foil and let it defrost, then unwrap from the plastic wrap.
*Store your bread in plastic to keep it from drying out. If you live in a humid environment or the weather is humid at the time- whenever you cut some slices, lay the bread cut side down on your cutting board and let sit for a few minutes before returning to it's bag or container. You may also want to turn a bag inside out to air it out. This will keep moisture buildup from making your bread moldy quickly.
Use up stale bread:
Bread Pudding